If your home is due for an attic insulation upgrade, whether because of age, moisture, rodent contamination, or poor performance, you’re likely wondering what the removal process involves.
While it may seem like a straightforward task, attic insulation removal is a job best left to the professionals.
From health and safety concerns to proper containment and cleanup, a professional removal ensures your home is protected and ready for new, energy-efficient insulation.
Here’s a detailed look at what to expect during professional attic insulation removal and why it is so important.
Why Professional Removal Matters
Attic insulation doesn’t just keep your home warm in the winter and cool in the summer; it also directly impacts your indoor air quality. But over time, insulation can break down or become contaminated with allergens, moisture, or even hazardous materials like mold.
While it may be tempting to delay removal or attempt a DIY solution, hiring a professional is essential for your health and safety.
Health and Safety Risks
Old insulation can harbor:
- Mold spores
- Rodent feces and urine
- Insect nests
- Dust mites
These contaminants can cause respiratory problems, allergic reactions, and even long-term health issues. Professional teams use protective gear, HEPA vacuums, and proper containment to minimize exposure and keep your living space safe.
Proper Containment and Compliance
Professionals understand how to:
- Set up containment barriers
- Use negative air machines and scrubbers
- Safely bag and dispose of materials per local environmental regulations
This is especially important if your insulation is considered hazardous waste. Attempting to remove it yourself could spread dangerous particles throughout your home, or worse, result in fines or penalties for improper disposal.
Attic Insulation Removal Process
Now that you understand the importance, let’s break down the typical steps involved in a professional insulation removal service so you can know what to expect.
Before hiring a professional removal team, make sure they do the following.
1. Initial Inspection and Assessment
Before removal begins, your insulation contractor will conduct a thorough inspection to evaluate the current state of your attic. This includes:
- Identifying insulation type (fiberglass batts, blown-in cellulose, mineral wool, spray foam, etc.)
- Checking the condition of the insulation (wet, compacted, moldy, chewed up by rodents)
- Inspecting for signs of pest infestation or water damage
- Looking for structural concerns like wood rot or sagging joists
This assessment helps determine the best removal approach and whether additional services, like pest remediation or roof repair, are needed.
2. Pre-Removal Preparation
Once the inspection is complete and a plan is in place, the team will prepare your home for the removal process.
This may include:
- Covering floors, walls, and furniture in the area below the attic
- Sealing HVAC vents and ducts to prevent the spread of contaminants
- Installing plastic sheeting or zip walls to contain dust
- Setting up HEPA-filtered vacuums and air scrubbers
This stage is crucial to protect your home from insulation debris and ensure good indoor air quality throughout the process.
3. Removal Process
The method of insulation removal depends on the type and condition of your attic insulation.
Suction or Manual Extraction Methods
Depending on the insulation type, technicians may use:
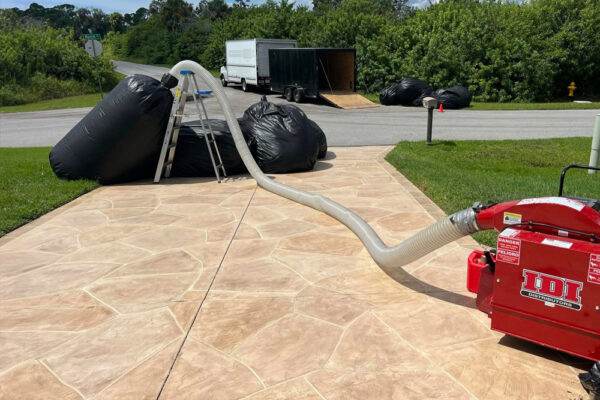
- Loose-fill insulation like cellulose or fiberglass is typically removed with a high-powered vacuum system that transports the material into a containment truck.
- Batt insulation (fiberglass batts or rolls) is carefully removed by hand and rolled up for disposal.
- Spray foam insulation often requires specialized tools to cut and scrape it off rafters or joists.
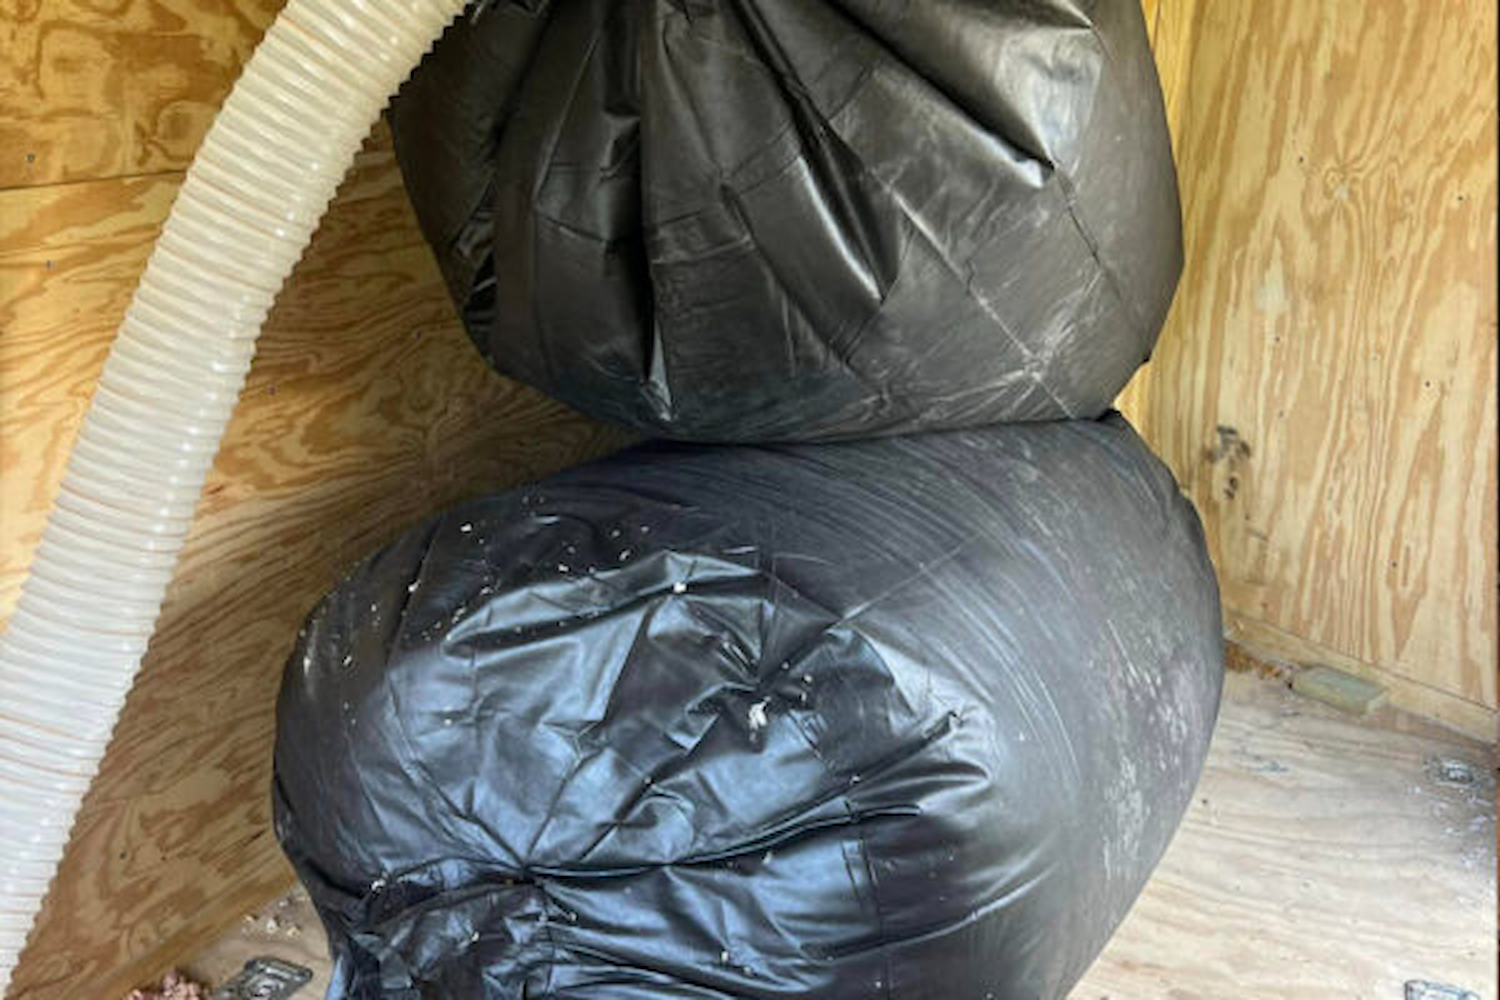
Bagging and Safe Disposal of Old Insulation
All removed insulation is double-bagged in heavy-duty plastic or directly vacuumed into sealed containers. This prevents cross-contamination and makes disposal safer and more efficient.
Professionals transport and dispose of the waste at licensed facilities that handle construction and potentially hazardous materials.
4. Addressing Contaminants and Odors
This step is often overlooked in DIY and low-quality insulation removal, but it is crucial to the health of your family. Sanitization is a critical step, especially if the insulation was compromised by pests or moisture.
If rodent droppings, mold, or mildew are present, the attic will be treated with disinfectants and odor-neutralizing agents. Deodorizers and mold-inhibiting sprays are used to ensure the space is not only clean but also stays that way long-term.
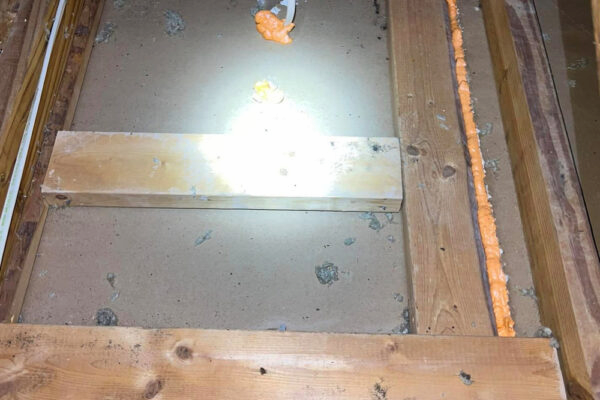
5. Inspection After Removal
Before moving on to re-insulation, the space is inspected to confirm it meets cleanliness and safety standards. With insulation out of the way, this phase allows them to:
- Check for roof leaks
- Inspect joists and rafters for damage
- Identify hidden entry points for pests
- Evaluate overall air sealing needs
This thorough inspection sets the stage for a high-performing insulation upgrade.
6. Preparing for New Insulation
Before new insulation is added, all cracks and gaps are sealed to prevent energy loss.
You’ll then have the opportunity to install high-performance R30 or R38 loose-fill fiberglass insulation that improves comfort and lowers utility bills year-round.
Timeline and Disruption Expectations
Home improvement projects can feel disruptive, but professional insulation removal is typically quick and well-managed. So, what should you, as a homeowner, expect?
How Long Does the Process Take?
Most professional attic insulation removals take 1–2 days, depending on the attic size, insulation type, and extent of contamination. This means you can get back to living your life without any headaches.
Homeowner Responsibilities During Removal
You may be asked to clear access to the attic and avoid using certain HVAC systems during the process. Your insulation contractor will give you specific prep instructions.
Hire A Pro For Your Attic Insulation Removal
With a professional team, you get the benefit of experience, safety compliance, and efficient cleanup – something DIY efforts can’t always guarantee.
Replacing your old attic insulation isn’t just about improving air quality. It can significantly boost your home’s energy efficiency, lower your utility bills, and make every season more comfortable.
Ready to remove and upgrade your insulation? Request a free quote to schedule an inspection and receive a tailored plan for your attic.